Home » Plumbing
Category Archives: Plumbing
The Importance of Customer Service for Plumbers
Plumbers are responsible for the installation and repair of piping systems that facilitate water supply, heating, and sewage disposal in residential and commercial settings. They often work closely with architects and construction teams to ensure plumbing is integrated seamlessly into building projects.

There’s a lot more to being Baytown Plumbers than putting on your rubber gloves and fixing leaky taps. Learn about the hard and soft skills needed to succeed in this fascinating career.
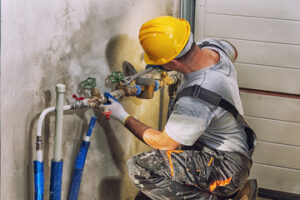
When a plumber installs plumbing fixtures such as sinks, toilets and tubs, they follow a specific process called rough-in. Rough-in is the first step of installing new pipes for a plumbing system, and it involves determining where your water, sewage and waste lines will run. The plumber also locates the main line that connects your house to the city water supply. The plumber then cuts holes in the walls, floors and ceiling to run lengths of pipe. This process is usually done before drywall is installed and may require the removal of existing fixtures such as bathtubs or shower bases.
During the rough-in stage, the plumber tests for proper water pressure and checks for leaks. They will also install shut-off valves, so you can cut off the water to a specific area if needed. In addition, they will also install a “clean out” fitting on the main drain line, which is a removable plug that allows you to clean out the line when necessary.
Once the plumbing rough-in is complete, the plumber will install the faucets, shower heads, and other fixtures. They will then test again for water pressure and leaks, but this time they will also make sure the plumbing can handle the load of the fixtures. They will also use silicone sealants to ensure the joints are tight and watertight.
While some people try to do their own plumbing installations, it’s always best to leave it to a professional. This is because a poorly-installed plumbing system can lead to costly repairs and even health hazards. A plumber has the skills and equipment to properly install any type of plumbing fixture. Plus, they will be able to do it much faster than someone without training or experience. A professional plumber will also be able to offer you a warranty for their work, which will give you peace of mind knowing that the job was done correctly.
Repair
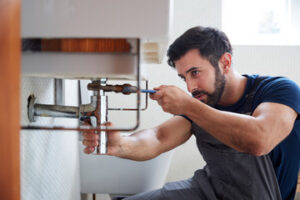
As a homeowner, there may be times when you’re faced with a plumbing problem that you can’t fix yourself. From clogged drains to water heater repairs, it’s important to know when to call a professional. However, there are also many simple plumbing fixes that you can do yourself to save money and hassle.
Plumbers install and repair a wide variety of plumbing systems in homes and businesses. Their job duties include examining building blueprints and codes to determine the best location for pipes, fixtures, and appliances. They also diagnose problems with existing plumbing and make recommendations for repair.
To repair a damaged pipe, plumbers typically use one of two techniques: epoxy lining or pipe bursting. In the former, a plumber will cut a section of pipe liner and then imbue it with a liquid epoxy resin. Once the resin hardens, it will create a new coating that seals leaks and reinforces the integrity of the pipe. In the latter, a plumber will pull a new pipe through a hole in the existing one, using a winch to assist with the process.
Regardless of the type of repair, plumbers must always follow safety protocols when working with dangerous materials or in elevated or confined spaces. They are also required to wear protective gear such as goggles and gloves. Plumbers may work in residential, commercial, or industrial settings, and they must be able to adapt to a range of workplace conditions.
While many people consider plumbing to be an easy trade, it does require a certain amount of skill and knowledge. Those who are passionate about this career often have a high school diploma or equivalent and have completed an apprenticeship program. This will give them the hands-on experience and training needed to succeed in the field.
For those who are not interested in becoming plumbers, there are plenty of other skilled trades out there that can provide a steady income. But, if you’re committed to this profession, there is no better way to contribute to society than by helping people with their daily needs. Whether you’re fixing an overflowing toilet or installing a new water heater, your work will help families, businesses, and communities thrive.
Maintenance
Plumbing maintenance is the process of regularly inspecting, cleaning and repairing plumbing systems and components to prevent problems such as leaks, burst pipes, or dirty water. It involves a routine checklist managed by expert plumbers to preserve optimal functioning across several critical areas of a building.
Preventative maintenance is essential to extend the lifespan of your plumbing system, reduce the risk of unexpected emergencies and minimize water waste. It also helps you save money by detecting and addressing leaks and other issues before they become costly repairs. In addition, implementing an effective plumbing maintenance plan is a responsible way to help reduce your carbon footprint by lowering your energy consumption.
During a routine inspection, your plumber will review your water supply system to check for signs of damage and other issues like low or inadequate water pressure. They will also examine your fixtures and appliances, such as the sinks, toilets, bathtubs, showers, and dishwashers for any problems or leaks. They will also inspect your drain lines, sewer systems and the condition of your water heater.
A clogged drain, overflowing toilet, or broken water pipe can lead to expensive repair bills and extensive home damage. To avoid these emergency situations, it’s crucial to have a plumber you can trust to perform regular plumbing maintenance. During the inspection, your plumber will test for leaks, look for signs of corrosion or wear, and identify any potential problems that need to be addressed immediately.
The plumber will then recommend any necessary maintenance or repairs and provide you with a quote. You can choose to schedule your maintenance at a time that’s convenient for you and your budget. Some people prefer to have a plumber come out once a month, while others prefer scheduling maintenance every quarter or twice a year. Regardless of the frequency, make sure you stick with it to ensure consistent upkeep.
A regular plumbing maintenance schedule can help you detect and address problems before they turn into expensive or disruptive emergencies. In addition, it’s important to educate your family about proper water usage and other habits that can prevent plumbing problems in the future. For example, teaching kids to shut off the water valve before using the sink can help keep your plumbing in good working condition for years to come.
Customer Service
In the plumbing industry, customer satisfaction is a cornerstone of success. It leads to repeat business, positive reviews and referrals, and ultimately, the growth and success of a plumbing company. Mastering customer service requires a combination of skills that include clear communication, empathetic listening, transparency, and proactive engagement. Plumbers that are skilled in these areas can ensure their customers receive the best possible experience and feel valued throughout the process.
A high-quality CRM system is a valuable tool for plumbers, as it provides a centralized platform for all customer interactions. A CRM can be used to track every aspect of a customer’s service journey, from booking an appointment online to dispatching the nearest technician and sending real-time job status updates. It can also be used to manage scheduling and billing, allowing plumbers to provide a seamless, efficient customer experience that maximizes customer loyalty.
In order to make the most of a CRM system, a plumbing company should ensure that its employees are trained on its use. This can be done by providing regular training sessions and by implementing an internal learning management system. In addition to streamlining the customer service process, a quality CRM can help a plumbing business improve its operations by tracking data and analyzing trends. By using this information, a plumber can better understand its customers’ needs and preferences and deliver more effective services.
Another important element of a quality CRM is the ability to offer robust support capabilities. Ideally, a plumber should have a 24/7 custom-trained AI agent that can answer calls and respond to inquiries in a timely manner. This can significantly reduce wait times and ensure that all customer concerns are addressed promptly.
Lastly, it is important for a plumber to implement a quality control program. This can be done by incorporating a checklist for each type of plumbing service, and by providing ongoing training to staff. This will help to ensure that all jobs are completed correctly and that the highest standards of customer service are met.
One final piece of advice for plumbers is to use targeted digital marketing to reach potential customers. This can be done by running ads on social media and in search engine results, as well as by using email marketing to send informative, relevant content to interested parties. By doing so, a plumber can effectively and efficiently reach the people who are most likely to book a service.
Plumbers and Sump Pumps
Plumber Clearwater FL installs, repairs, and maintains the pipes and fixtures that carry water and waste in residential and commercial settings. They often collaborate with construction teams and architects to ensure that plumbing systems integrate seamlessly into building projects.
They may also need to interpret blueprints and building codes and inspect plumbing equipment and structures. Plumbers frequently work evenings and weekends and are on-call for emergency situations.
A sump pump moves accumulated water away from your basement or crawl space, pushing it outdoors or into a drainage area when the water level rises. It’s a smart investment in your home, especially if your property has a history of flooding or if you live in an area prone to extreme weather conditions.
Sump pumps typically sit in a pit that’s located below the lowest part of your basement or crawl space. The pit is lined with a special liner, which helps prevent the liner from cracking or otherwise failing.
To start the sump installation process, locate the pump’s discharge pipe, which will run from the sump basin to a point outside your home. It’s important to keep in mind that the discharge line must be at least 10 feet (3.0 m) away from your foundation wall to prevent water from back-flowing into the house and creating further damage.
After finding the best location for the pump, dig a hole that’s large enough to accommodate your sump basin. Once the hole is excavated, add 2 to 3 inches of gravel to the bottom of the pit to support your sump pump and establish a sturdy base. Then, place a layer of filter fabric around the bottom of the basin to prevent silt and other debris from clogging the pit.
Once the filter fabric is in place, set your basin into the hole and backfill it with excavated dirt to secure it. Now it’s time to connect the plumbing and test your sump pump. To do this, slowly pour water into the basin until the float switch activates and turns on your pump. If it does turn on, drain the water and install a basin cover to keep debris out of the sump pit and reduce odors.
Lastly, a check valve should be installed to ensure that the discharge line only channels water out of (never back into) your home. This can be accomplished with a flexible discharge hose or with a span of PVC pipe that’s glued and well-secured at each end.
Sump Pump Maintenance
Once the sump pump is installed, it’s important to have it regularly inspected and cleaned. This will help to ensure that the unit is working properly, which can reduce your risk of costly repairs or replacement in the future.
The plumber will start by turning off the power to the sump pump. This is so that they can safely work on it without any risk of electric shock. They will also check to make sure that the float switch is set correctly so that it triggers operations when water in the basin reaches a certain level.
Next, the plumber will clean the pit and all of its components. This includes the battery, float switch, and inlet screen. They will also look for an oily residue inside the pump (which could indicate a defective seal). The plumber will verify that the backup power source is working and that the battery is charged.
Then the plumber will test the pump by pouring water into it to see if it starts and stops operation automatically. They will also check that the discharge pipe isn’t clogged with debris.
In addition to these tests, the plumber will examine the entire sump system for signs of damage or wear. They will take note of the location of the pump in the basin and the discharge pipe, and they will use a level to make sure that it is perfectly level both horizontally and vertically. They will also look for any areas that are leaking or cracked, as well as any corrosion on the pump’s parts.
Once the plumber is finished, they will reconnect everything and test the pump again. They will also look at the surrounding area to check for any mold growth or other issues that may need to be addressed. It’s a good idea to keep the pit covered when it’s not in use, which will help to prevent lint and sediment from entering the sump pump and pit. This will also help to keep the area dry and sanitary. If the pit has a cover, the plumber will remove it and replace it after the testing and cleaning is complete.
Sump Pump Repair
Unless you’re an experienced plumber, it’s best to let your local sump pump professional handle any necessary repairs or maintenance. For routine maintenance, they will first remove the pump from its basin and then remove the discharge pipe to check for obstructions. This will also give them a chance to inspect the pump for corrosion or other damage.
They will also check the inlet screen and the battery to make sure they are clean and in good working order. They may also lubricate the bearings to extend their life. Next, they will fill the basin with five gallons of water to ensure that the float switch works properly and to check the condition of the pump’s bearings. If you notice rust, it’s time to replace the pump.
If your sump pump turns on and off too often, it could indicate a problem with the float switch or a discharge line that is clogged. In addition, it could mean that the pump is undersized and that you need to upgrade to a larger model.
Other signs that your sump pump needs attention include a humming or banging sound, which can be caused by a damaged impeller or a jammed check valve. If the pump’s noise is accompanied by flooding or water leaking into your basement, it’s important to act quickly to prevent costly damage.
Your sump pump protects your home from expensive and destructive flood damage, but it’s vital to keep it functioning correctly by performing regular maintenance. A plumber can help you with this task, saving you money and reducing the risk of property damage. Contact Healthy Basement Systems to schedule a sump pump service today! We proudly serve Huntington, Smithtown, Bay Shore, Brentwood, Hempstead, Massapequa, and other Long Island communities. Request a quote online or call us to learn more about our services.
Sump Pump Replacement
A plumber can help you decide when it’s time to replace your old sump pump. They’ll consult on your home’s needs, considering factors like the size of your basement, the area’s average water table, and the frequency of heavy rainfall in your region. They’ll also advise on whether a combination sump pump or battery backup pump will work best for your home.
A common sign that it’s time to replace a sump pump is if the pump has an odor, rust, or is making loud noises when running. Odors could indicate that the impeller is cracked or that it has a blockage. Noise is usually an indication that the pump has a faulty check valve, which requires replacement.
Perpetual cycles indicate that the sump pump is unable to keep up with your basement’s water levels. It could also mean that the float switch is stuck in an “on” position, or it could be a result of other issues, like a broken underground pipe funneling water to the pump on a constant basis.
If you’re installing a new sump pump, the plumber will disconnect it from its power source and any discharge pipes or hoses. Then, they’ll remove the old sump pump from the pit and place the new pump in the pit, ensuring it is properly positioned and level. They’ll then connect the pump to its power source and any discharge piping or hoses.
The plumber may also install a new sump pit cover, which helps reduce the odor and noise of the pump, as well as keeping kids and pets out of the pump. They may also recommend adding a spring-loaded check valve to your sump pump, which can reduce the amount of gurgling noise that occurs as the water flows through the discharge pipe.
If you’re doing the installation yourself, make sure that the discharge pipe on your new sump pump is a match for your existing discharge pipe and that the arrow on the discharge pipe points up, which indicates that water flows up and out of the pit. Then, either screw on the new pipe or glue a male adapter onto one end of the pipe and then thread it into the hole on the sump pump.
Hot Water Heater Repair Basics
A water heater can become a source of frustration when it starts to malfunction. Some problems require the help of a plumber while others are simple enough to fix on your own.
If the hot water heater keeps tripping the circuit breaker, or is blowing out the pilot light (applicable to gas water heaters only), it’s time to call a plumber. For professional help, contact Hot Water Heater Repair Morris County.
Thermostats are an integral part of any hot water heater, as they help to regulate the temperature of your water. However, over time, they can become corroded or damaged, leading to insufficient heating or even failure. In some cases, your thermostat may simply need to be replaced. The first step in this process is to shut off the power supply. This can be done by flipping the switch located on the circuit breaker box. Once the power is off, you can remove the access panel and check the heat setting on each of the two thermostats. If the thermostats are set to high, you should lower them.
Typically, the lower thermostat handles the majority of your household’s hot water needs, while the upper thermostat kicks in when needed. If one of these thermostats fails to operate, you will have a difficult time generating enough hot water for your household needs. The good news is that a thermostat replacement is relatively inexpensive.
For older water heaters, the thermostat can be a mercury switch. This type of thermometer uses a strip of bimetallic metal that coils and uncoils based on the temperature, triggering a relay to turn on the heater when it hits a particular temperature. This is less efficient than a modern digital thermometer, but is still a cost-effective way to regulate temperature.
If your water heater is producing insufficient hot water, the problem could be due to an undersized tank. However, the cause can also be an issue of the heating elements. This is a common problem for electric water heaters as they age and can be a costly repair.
You can test your water heaters heating elements using a continuity tester, which is available at most hardware stores for about $10. This tool will let you know if the element is bad or simply needs to be replaced.
Strange noises coming from your water heater can indicate sediment build up in the bottom of the tank. To remedy this, you can flush the water heater by turning off the power and draining the water (following the manufacturer’s guidelines). You can also try adjusting the temperature on your unit if it seems to be running too hot or too cold.
Pressure Relief Valve
The pressure relief valve is a safety device that protects the system from overpressure. It is a manually operated valve with a handle, which, when lifted and released, discharges water or gas to reduce excess pressure in the system. The set pressure of the valve should be lower than the maximum system pressure to ensure safe operation. There are different valve types and sizes available to suit the specific system needs. A selection of accessories may also be required for a pressure relief valve, including wall mountings and gauges. Tubing and fittings are commonly used for connecting the valve into a system. Tamper resistant kits are available for some valves.
If you notice a pool of water at the top of your water heater, it is likely due to a leaking pressure relief valve. To check a valve, shut off the electricity and cold water supply to the unit, place a bucket under the plastic relief valve drain pipe, then open the pressure valve handle. The water should flow into the bucket to relieve the pressure, indicating that the valve is working properly.
Water dripping from the top of a hot water heater may be caused by a loose or damaged drain valve or by a broken thermocouple, which is designed to sense that the pilot light is lit and keep the gas valve opened. Inspect the thermocouple for corrosion, cracks, or other damage. Replace if necessary.
A malfunctioning pressure relief valve can cause excessive fluid or gas pressure in the system, potentially resulting in damage to the vessel or system and a potential explosion. The reseat pressure, cracking pressure, and shut off pressure of the valve must be specified correctly to avoid leakage and to achieve normal system operation.
A conventional spring-loaded pressure relief valve has a disc that is held in place by the spring force until the system pressure exceeds the cracking or overpressure point. When the system pressure reaches this point, it overcomes the spring force, which causes the valve to open and relieve the excess pressure. A bellows-type design has an additional feature that balances back pressure on the valve. This prevents the valve from opening and releasing system pressure just because of a change in back pressure.
Drain Valve
If a hot water heater has a faulty drain valve, it can cause the tank to leak and flood causing expensive damages. This is a common issue with older hot water heaters and can be caused by build-up of sediment on the valve. To fix this, it is recommended that the drain valve should be drained regularly. This is done by attaching a hose to the drain valve and opening it to let water flow out. This will help to remove any build-up of sediment that could be causing the valve to leak.
If you notice puddles of water on the floor around your hot water heater, this may be an indication that it has a leaking drain valve. This is a serious problem that needs to be addressed as soon as possible to avoid flooding and other damage to your home.
A functioning drain valve is important for the operation of a hot water heater, as it allows for the proper drainage and maintenance of the unit. If a drain valve becomes clogged or damaged, it can lead to a number of problems, including leaking water, poor hot water flow, and rust or corrosion. To fix this, it is necessary to turn off the power supply and water supply to the water heater, drain the unit, and install a new drain valve.
To do this, first turn off the power to the water heater by finding the circuit breaker or fuse for it and turning it off. Next, locate the water supply valve and shut it off by turning it clockwise. Once these steps have been taken, it is time to drain the water heater. To do this, begin by connecting a hose to the drain valve and directing it to a safe location where it can flow out without causing any damage or flooding.
After the tank has been drained, it is important to remove the old drain valve and dispose of it properly. To do this, begin by using a wrench to loosen the valve from its position and unscrewing it. Be careful not to use too much force, as this can damage the valve or the surrounding components. Once the valve has been removed, take note of any gaskets or seals that were attached to it and make sure to remove these as well.
Anode Rod
Anode rods (also known as sacrificial anode rods) are long metal rods that run down the center of a traditional water heater tank. They are often made of aluminum, magnesium, or a combination of these metals wrapped around a steel wire core. The anode rod is designed to corrode faster than the tank itself, thus protecting it from corrosion. A well-functioning anode rod can extend the life of your water heater by years, saving you from a costly replacement.
You can easily check anode rod functionality by inspecting it for excessive wear. If it’s heavily corroded, has been reduced significantly in diameter, or covered with thick layers of calcium carbonate, it needs to be replaced. It’s a simple and inexpensive process that prevents expensive problems with your water heater.
Smelly water is another sign that it’s time to replace the anode rod. Sulfur in the water is responsible for that distinct rotten egg smell, and sulfur-reducing bacteria eat away at anode rods, eventually causing them to degrade. Replacing the anode rod eliminates the sulfur odor and keeps your water safe and clean.
Anode rods can be purchased at most hardware stores, though you’ll need a socket wrench to loosen and remove the old one. A new rod can then be inserted and tightened using the same method. It’s important to choose the correct anode rod, which is generally made of aluminum instead of magnesium. Aluminum produces a stronger current, and will last longer in hard water.
While it’s possible to perform an anode rod inspection on your own, it’s typically best to have a professional do this work. Draining the water heater will typically be necessary, and you’ll need a good amount of overhead clearance to access the rod. Unless you’re an experienced plumber, it’s difficult to safely install or remove the rod without damaging other components of your water heater or water entry pipes. It’s also likely that you’ll need a special anode rod wrench, which many homeowners don’t have. Adding anode rod maintenance to your regular water heater flushes can help you keep your water hot and healthy for your family.